Kategorier
Synology

Simple step by step guide to getting Root Access on a Synology DiskStation

Since DSM 6.0 Synology removed the root access. Actually they only changed the password to ” (nothing).

But if you follow this simple guide, you will get root access to your Synology Disk Station again.
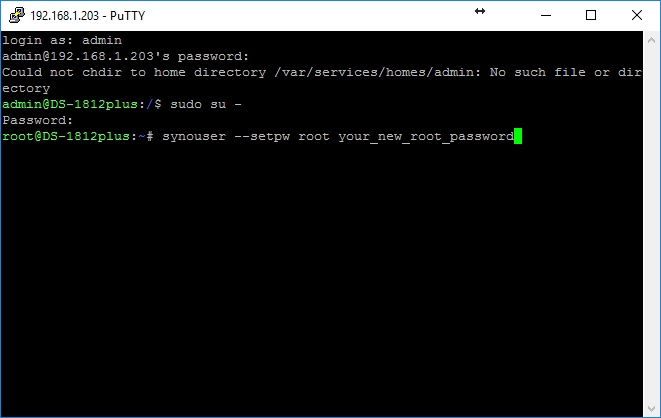
  1. Login using Putty (Find it here) with your administrator account (usually “admin”)
  2. Enter the local IP of your Synology Diskstation into Putty. (In my case, created for this guide, the IP is 192.168.1.203)
  3. You will be asked for a password. (Enter the one for this administrator account. You can not see the password, when you enter it. But it is being entered.)
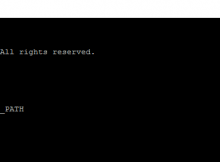
  4. You will get a command prompt (like in the picture above admin@…)
  5. Enter: sudo su –
  6. You will be asked for a password. (Enter again the one for the administrator account)
  7. You will get a command prompt that says root@…
  8. Enter command: synouser –setpw root your_new_root_password    (change the italic text to be your own root password)

Now your root account has a password, and can be used in e.g. WinScp.

Enjoy.
Kategorier
Synology

Synology DSM 6.0 Root Access

UPDATED – UPDATED – UPDATED

PLEASE READ THE STEP BY STEP GUIDE (THE UPDATE)

Simple step by step guide to getting Root Access on a Synology DiskStation

I’ve read this article, and decided to save the text – just to be sure.

http://www.mauchle.name/blog/?p=239

What I did was this:

Getting root access to the Synology after the DSM 6.0 update is solved by doing this.

If you get the WinScp, then you alse get the PuTTY and PuTTYgen.

I’ve used the Config File Editor as explained.

Afterwards I logged into WinScp and used the private key under Advanced–SSH—Authentication.

You’ve of course chosen a very difficult admin/root password for your Synology diskstation – but now everytime you want to connect with Putty you need to type in that long chain of characters, numbers and symbols.

Why not use a a keypair?

    1. Download PuTTY and PuTTYgen (or just get the installer, everything is in there) from here.
    2. Generate a keypair with PuTTYgen (Parameters: SSH-2 RSA)
    3. Save the private key as “myprivatekey.ppk”
    4. Copy the public key to the clipboard. Looks somewhat like this:
      ssh-rsa AAAAB3NzaC1yc2EAAAABJQAAAIEAzP4MR3lkCD2pa7nwT3NMjjDBMmEuJ4exW4GKBBP+okArZ/IrjbLIpdh8ahpfgjh8kM//OVUGeRa1GigzcCuGzIa2YfS7L4Q9cbUUWFwIu2hGV3ZpJ2xDZExaaLH90Vw+ZBaozD2OI4FZ1Dqh8Bj29SQqIIbmxf/ASyTmXHZCbQk= rsa-key-20130414
    5. Connect to your diskstation with PuTTY
      diskstation:22
    6. Login as root
    7. Edit the SSH config with
      vi /etc/ssh/sshd_config
    8. Look for the following lines
      #RSAAuthentication yes
      #PubkeyAuthentication yes
      #AuthorizedKeysFile      .ssh/authorized_keys
    9. Change them to this (by hitting “x” when the cursor is over the # and hitting ESC, then typing :wq ENTER)
      #RSAAuthentication yes
      PubkeyAuthentication yes
      AuthorizedKeysFile      .ssh/authorized_keys
    10. Go to /root and create the .ssh folder
      cd /root
      mkdir .ssh
    11. Edit the keyfile
      vi /root/.ssh/authorized_keys
    12. Press “i”
    13. Paste your public key (by right clickking on your mouse) and save the file (Hit Esc, type :wq, hit Enter)
      ssh-rsa AAAAB3NzaC1yc2EAAAABJQAAAIEAzP4MR3lkCD2pa7nwT3NMjjDBMmEuJ4exW4GKBBP+okArZ/IrjbLIpdh8ahpfgjh8kM//OVUGeRa1GigzcCuGzIa2YfS7L4Q9cbUUWFwIu2hGV3ZpJ2xDZExaaLH90Vw+ZBaozD2OI4FZ1Dqh8Bj29SQqIIbmxf/ASyTmXHZCbQk= rsa-key-20130414
    14. Set the access-rights to the file
      chmod 700 /root/.ssh
      chmod 644 /root/.ssh/authorized_keys
    15. Disconnect with
      exit
    16. Open Putty again and make the following settings

      Hostname: or
      Port: 22
      Connection type: SSH
      Connection->Data->Auto-login username: root
      Connection->SSH->Auth->Private Key: Your Keyfile
      And save the session as <sessionname>
    17. Create a new shortcut on your desktop with the following target
      "C:\Program Files (x86)\PuTTY\putty.exe" -load "sessionname"
    18. Finished. From now on you can connect by double-clicking.

Written with information from Chainsaw on a Tire Swing

Kategorier
Synology

chmod /etc/sudoers to 0640 and locked myself out of DSM 6.0 – SOLVED/SOLOUTION!

If you, like I also did, locked yourself out like in this thread:

https://forum.synology.com/enu/viewtopic.php?f=90&p=424906

I got this error:

sudo: /etc/sudoers is world writable
sudo: no valid sudoers sources found, quitting
sudo: unable to initialize policy plugin

———————————-

I do not support and can not be held responsible for any damage this would do to your device. I only state that it worked for me.

———————————-

SOLUTION

Now I explain what worked for me.

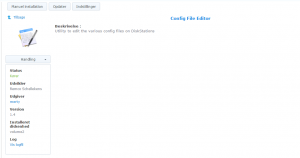
Install Config FIle Editor package in your DSM-package center. It can be found here.

ConfigFileEditor-synology

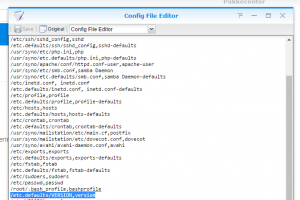
Now you can use Config File Editor to edit your versionnumber and do a downgrade.

ConfigFileEditor-synology-version

First add this line to the config file editor

/etc.defaults/VERSION,version

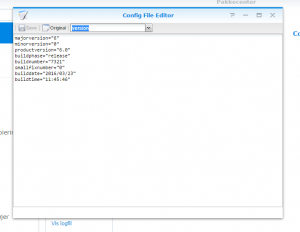
Close down the Config File Editor and open it again. Choose version in the drop down.

ConfigFileEditor-synology-newbuild

Change buildnumber to eg 7100.

Now you can do a manual downgrade to beta 1 – this gives you your root access back (find the update icon in control panel and do a manual installation af the DSM 6.0 beta 1)

Find your DSM 6.0 Beta 1 here:

http://usdl.synology.com/download/DSM/beta/6.0/7135/


It bricked my Synology. Now I was not able to access my DSM.

synology-noaccessdsm


But I still/now could login with my root login and pass through SSH.

So login to your NAS with your normal root login and password. (I use PuTTY as explained here – use ssh and type the local ip to your NAS).

Change sudoers chmod to 0440 in the etc-folder

cd etc
chmod 0440 sudoers

Thereafter you are able to upgrade from command line with this command, that I found here.

synoupgrade 
Copyright (c) 2003-2012 Synology Inc. All rights reserved.

   --auto
   --check
   --download
   --start
   --parse
   --patch ABSOULATE_UPGRADE_FILE_PATH

update I used synoupgrade –auto (that worked, 10-15 min. later it was updated and accessible again)

It did display some errors, but ended up with

updatedone

Then it restarted and voila – it works.

Hope it workes for you to.


Kategorier
Synology

Synology DSM 6.0 Root Access for andre brugere

Jeg har netop opdateret den server, hvorpå Minecraft-serveren ligger. Det betyder desværre, at jeg nu har mistet root-adgang.
Dermed kan jeg ikke, kun med en administrator-bruger, slette, tilføje eller overskrive filer på serveren.

Jeg skriver herunder, hvad jeg har gjort for at ændre dette.

—————–

VIGTIGT VIGTIGT! DET KAN SMADRE DIN SYNOLOGY. JEG ER IKKE ANSVARLIG FOR, HVAD DER SKER OG YDER IKKE SUPPORT.

——————

Følgende virker:

Jeg har slået SSH til i DSM under Terminal.

Jeg har brugt PUTTY til at logge ind med:
www.chiark.greenend.org.uk/~sgtatham/putty/download.html

Skriv serverens adresse og port. (Fx Ip 192.168.100.200 og port 22 (bare et eksempel))

Log ind på serveren via PuTTY.

Skriv bruger og kodeord (brugeren skal være administrator)

Derefter skrives

sudo -s

Skriv password og skriv derefter

su -

Nu er du root.

Du skal ændre 2 filer.

gå ind i etc

cd etc
chmod 0666 group
chmod 0666 passwd
vi group

Nu skal du skrive admin-brugerens navn ved root (tryk på i for at indsætte, escape bagefter og skriv :wq – Dermed gemmes filen)

vi passwd

Nu skal du skrive  (tryk på i for at indsætte, escape bagefter og skriv :wq – Dermed gemmes filen)

adminbrugerensnavn:x:NUMMER:NUMMER:root:/root:/bin/ash

Husk at ændre rettighederne tilbage igen:

chmod 0644 group
chmod 0644 passwd

Hvis det ikke virker, så genstart og brug også følgende kommando:

chown -R adminbrugerensnavn:users biblioteketsnavn

Derefter kan man med fordel bruge programmet WinScp:

winscp.net


Guide:

http://www.wijngaard.org/get-access-to-synologys-filesystem/