Since DSM 6.0 Synology removed the root access. Actually they only changed the password to ” (nothing).
But if you follow this simple guide, you will get root access to your Synology Disk Station again.
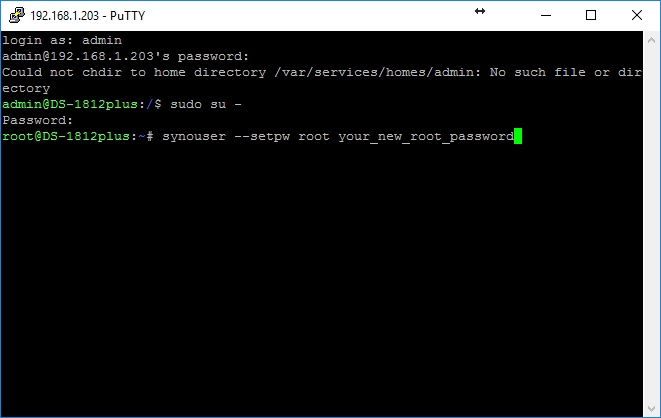
- Login using Putty (Find it here) with your administrator account (usually “admin”)
- Enter the local IP of your Synology Diskstation into Putty. (In my case, created for this guide, the IP is 192.168.1.203)
- You will be asked for a password. (Enter the one for this administrator account. You can not see the password, when you enter it. But it is being entered.)
- You will get a command prompt (like in the picture above admin@…)
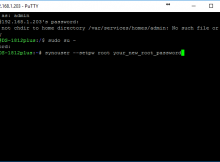
- Enter: sudo su –
- You will be asked for a password. (Enter again the one for the administrator account)
- You will get a command prompt that says root@…
- Enter command: synouser –setpw root your_new_root_password (change the italic text to be your own root password)
Now your root account has a password, and can be used in e.g. WinScp.
Enjoy.
En kommentar til “Simple step by step guide to getting Root Access on a Synology DiskStation”
[…] Simple step by step guid… […]